Forging a Handgonne
How it was done in the MiddleAges
Switch on loudspeaker so you may enjoy some contemporary renessance music
while studying this page.
With this section I'm going to introduce you to the way that our ancestors wrought their handgonnes. The majority of gonnes were made of iron, since those of brass or bronze were affordable by very wealthy people only.
My friend Benno Büchel, four times world champion in muzzle loader shooting (match lock discipline, originals) is an experienced black smith. He is partner of the Aigner & Büchel Co Smithy in Altstätten, Switzerland. This Company is employed throughout Europe for restoring and replicating old medieval iron works on public buildings. In recent years, Benno has organized more than one handgonne shoot, which have become increasingly popular in my country and he has replicated several old handgonnes using his professional skills. So I took my chance and recorded him making his gonne.
All he needs for materials is:
1) A proper flat iron-bar as the source of the gonne,
2) coal fire,
3) an anvil,
4) and a couple of hammers.
In this case, he copied the famous
Tabor-handgonne, once used in the Hussit wars ( 1420 to 1434), Bohemia.
|
 |
|
|
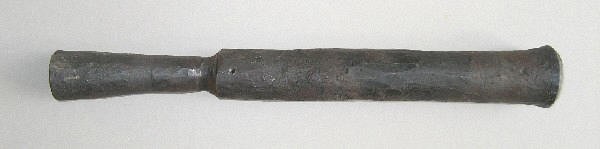
Fig 1: Here is the Tabor-gonne which Benno is going to make a copy from.
Length over all is 420 millimeter with a bore of 18 mm.
The photo is taken from "Alte Handfeuerwaffen" by Durdik, Mudra and Sada (1977). |
|
|
|
|
|
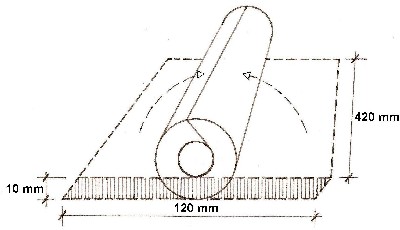
For this he cut a 120 x 420 millimeter flat bar, 10 millimeter thick. First he bevelled the edges on the side of the flat iron, so the barrel could be rolled with overlapping ends (Look Fig. 2). Then the seam was fire welded step by step on the anvil, after inserting a 16-millimeter rod for keeping the core open.
|
 |
|
| Fig. 2: Sketch of how the barrel will be rolled.
|
|
|
|
|
|
|
 |
|
|
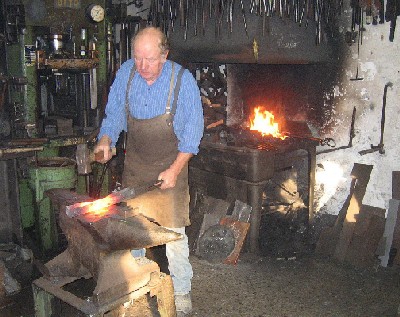
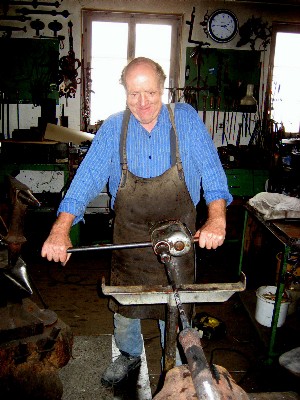
| Fig. 3: Benno, left, with his brother Otto, bevelling the edges alongside of the flat iron bar as a first step. Note a finished Tabor handgonne laying on the table in the foreground. |
|
|
|
|
|
|
 |
|
|
| Fig. 4: Here the flat bar is bent to U-shape, hammering it into a mould. |
|
|
|
|
|
|
 |
|
|
| Fig. 5: Then the "U" is closed to form a pipe, starting in the middle of the pipe. |
|
|
|
|
|
|
 |
|
|
| Fig. 6: This is the first step of rolling the "U" to a pipe. |
|
|
|
|
|
|
 |
|
|
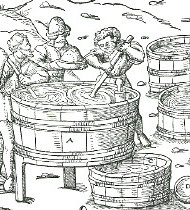
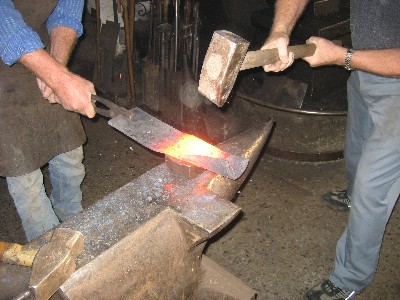
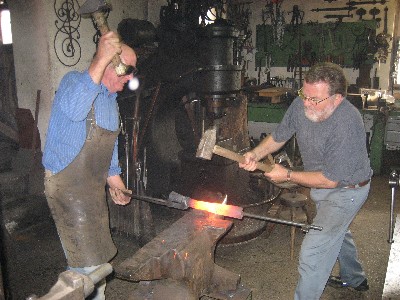
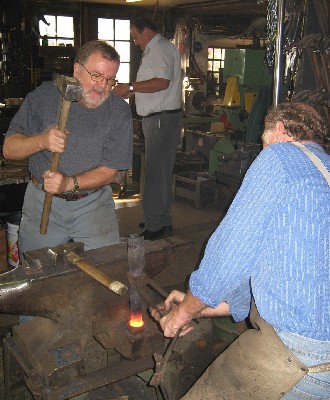
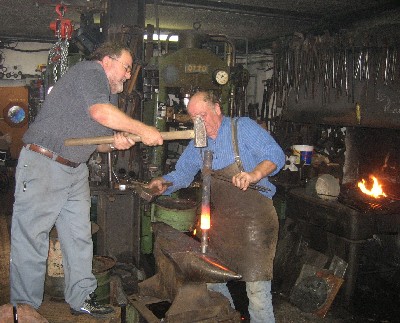
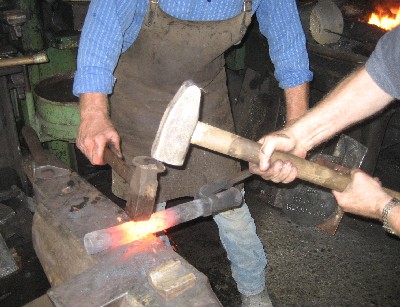
| Fig. 7: Fire-welding. The two brothers quickly hammering the white-hot pipe. A mixture of clay and glass powder is used as a flux. (Borax wasn't descovered back then). |
|
|
|
|
 |
|
|
| Fig. 8: Note the overlapping seam of the rolled barrel. |
|
|
|
|
|
|
|
 |
|
|
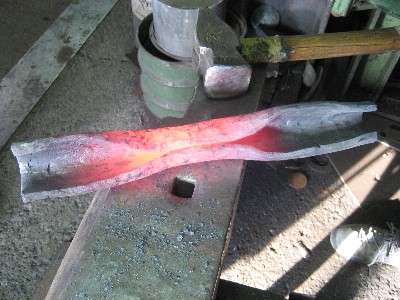
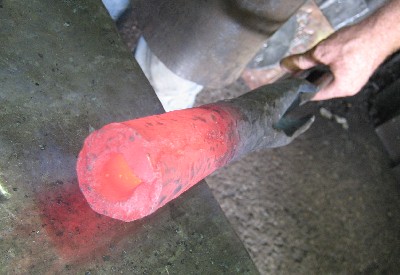
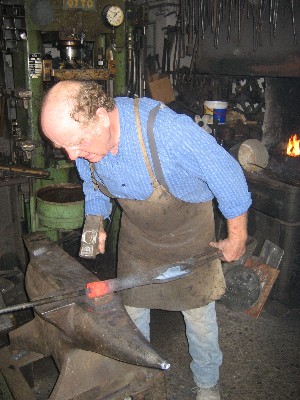
| Fig 9: Shaping the breech end of the future barrel. Note the inserted rod for keeping the bore open. |
|
|
|
|
|
|
|
|
 |
|
|
| Fig 10: After finishing the pipe the muzzle cone is upset by hammering the pipe head-on vertically into a matching mould (a kind of cup).
|
|
|
|
|
|
|
|
 |
|
|
| Fig. 11: The socket for stocking the finished gonne is widened by hammering the rear end of the barrel over a thorn. |
|
|
|
|
|
|
 |
|
|
| Fig. 12: The socket then is thinned out and lengthened here on the horn. |
|
|
|
|
|
|
 |
|
|
| Fig. 13: Finally a breech plug is inserted and the barrel constricted behind it. |
|
|
|
|
|
|
|
 |
|
|
| Fig. 14: Drilling the bore to 18 millimeter caliber. Our ancestors did it by hand. Benno uses a drilling machine for comfort. |
|
|
|
|
|
|
|
 |
|
| Fig. 15: The finished gonne |
|
|
|
|
|
 |
|
 |
|
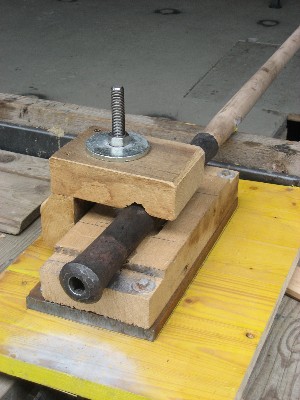
| Fig. 16: The finished gonne in her proofing block |
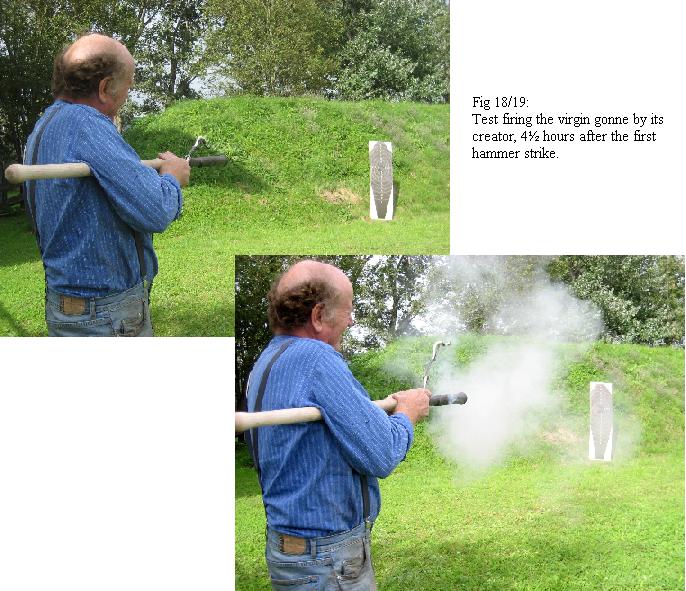
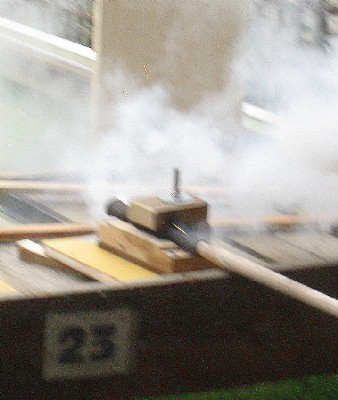
Fig. 17: Fired with a double load of 13 g (200 grains) of Swiss black powder #2 (=3F) behind two bullets, ignited by a fuse. |
|
|
|
|
|
|
|
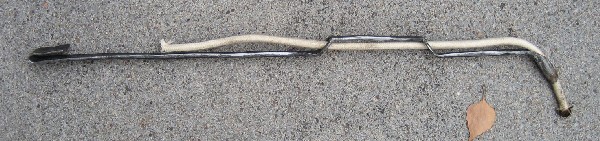
Fig 20: Bennos match holder. You can wear it hooked up on your belt while walking, without singing your pants. The smoldering match allways points away from your leg.